Polymer Clay Fan

Free Sculpting Tutorials

Search Results

My First Polymer Clay Sculpture

Posted by goregt On August - 28 - 2009

When I first started sculpting with polymer clay I basically only had around six weeks of sculpting experience. Up to that time the only clay that I even knew existed was a water based clay. For those of you that still sculpt with water based clays my condolences. To say that they are a challenge to work with is an understatement (unless you are using them for pottery or something along those lines).

I’ve always been one to push myself to the limits with my art and my first polymer clay sculpture was no exception to that rule. I wanted to create a sculpture that was both dynamic and unlike anything that I had ever seen before. I personally have always liked artwork that depicted angels so for my first piece I decided to create a piece that was my own version of how I think an angel would look like.
Read the rest of this entry »

Google Images

Posted by goregt On March - 18 - 2007

How can Google make you a better sculptor?

Every time I approach a new idea for a sculpture I always look at it as a learning experience. My personal goal is to challenge myself with each new piece. The more I push myself the more my skills grow over time.

If you want to grow as an artist then you should always challenge yourself with something new; always try to push yourself to the limits with each piece. No matter how difficult a subject matter may be for you today, if you keep practicing then over time you will master it.

Read the rest of this entry »

Soul Collector Update

Posted by goregt On August - 12 - 2011

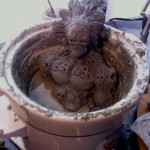
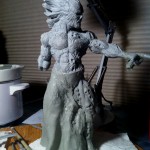
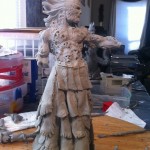
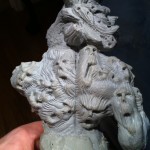
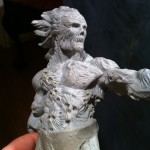
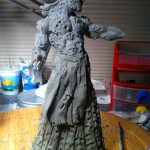
It has been too long since I’ve shown any updates on my Soul Collector redesign so I thought I would include a few pics here.  My designs have a tendency to evolve as I sculpt, so for fun I’ve included a few pictures in the gallery to show how the Soul Collector’s skirt has changed over time. I also included a picture where I’m melting the original Soul Collector statue.   In all honesty it was hard watching over 100 hours of work melt away but the experience gained will in the end benefit the new sculpture.

The sculpture will eventually be released as a cold cast bronze and additional details can be found at http://www.goreartistry.com/works-in-progress/soul-collector.htm

My images are below (click the image for a larger view).

Functional Art – Creating Unique Wine Stoppers

Posted by goregt On November - 26 - 2014

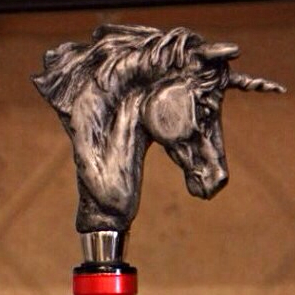
Gore Collection Unicorn Wine StopperOver the past few years I’ve gravitated from creating what I would consider more conceptual to functional based art. I still enjoy sculpting statues and figurines, that will always be a part of me, but I have to admit that creating a unique functional piece of artwork has a strong appeal to me. Not only is the artwork fun to look at, it’s also a great way to create an engaging conversation piece.

I started my functi0nal art journey a few years back making cigar related tools and as of late have spent a great number of hours creating art for the wine enthusiast. What’s intriguing about creating this type of art it that it really stimiluates my own creativity. I look at the world with a different view in that any and every item I interact with has an opportunity to also because an artistic centerpiece. Napkin holders, coasters, light switches, etc and etc offer endless opportunities to create something that is functional yet an attraction for its design and beauty.

If you have never created a functional piece of art then I highly recommend you give it a try. Push yourself with the design, make the challenge something that you have to give your very best effort. In the end no matter what you make, or how the design ends up, I truley believe you will grow as an artist. After all I’ve never grown much from my easy projects, it’s the ones I wanted to throw in the trash that really developed my skills. For me sculpting wine stoppers pushes the envelops of my creativity. I have to sculpt smaller than I prefer and on top of that I’m tasked with trying to create an appealing design that will rest on top of a wine bottle.

Go out and find your niche and try something new. Struggle with the project, push yourself, don’t give up and in the end I’m confident you will be a better artist for it.

If you would like to check out my latest endeavors you can view them at my

Etsy shop – www.etsy.com/shop/gorecollection or my website – www.gorecollection.com.

Bottle Stoppers

All the best,

Gerald Gore


Angel & Demons Cigar Ashtray Tutorial

Posted by goregt On January - 31 - 2012

My goal for this tutorial is to show step-by-step how the GoreArtistry cigar ashtrays are created from concept to the final product. The tutorial will be covering the following topics.

  1. Basic picture tutorial for the sculpting of the ashtray
  2. Creating the mold
  3. Pouring a cold-cast bronze
  4. Sanding and polishing the cold-cast bronze
  5. Final product

The first step in any project is coming up with a design. Great sculpting on top of a poor design will in most cases result in a mediocre product.  However, I’ve seen projects that have great designs with average sculpting skills create something that really is interesting to look at.  My goal is to hopefully strive for the best of both worlds with a product that results from above average sculpting skills and a great design (we shall see if I’m able to pull it off). Read the rest of this entry »

Cigar Ashtray Sculpting Trick

Posted by goregt On August - 11 - 2011

Skull cigar ashtray

For the most part I live a very healthy lifestyle, I’m in the gym six to seven days a week, eat very clean (except for Saturdays) and rarely drink.  I’m not oblivious to the fact that most people will probably find me to be a pretty boring person but hey I am what I am.  However, that being said one of the vices in my life is that I like to smoke cigars.  I don’t get to smoke them often, at best only a couple times a week, but they are something I’ve come to really enjoy over the years.

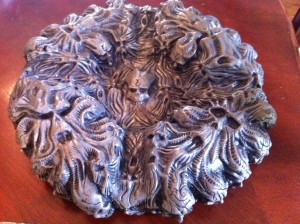
I enjoy collecting different cigar accessories, for example lighters and cutters, however one of the key accessories that was missing from my collection was a cigar ashtray.  There are quite a few cigar ashtrays out there that have a good design but I have yet to find one that really grabs my attention.  One of the key advantages of being an artist is that if I’m unable to find what I’m looking for in the commercial market I can always create it myself.  I wanted an ashtray consisting of skulls and skulls so it was off to the workshop to begin my project. Read the rest of this entry »

Tribal Back – 5

Posted by goregt On October - 7 - 2009

Not a lot going on with this lesson but I thought I would give a look at the back from one more angle. The left side of the back is as far as I’m going to take it until I move forward with the right half of my back. I wouldn’t recommend sculpting a back this way because it can mess up the balance of the muscles in the piece. The best approach is the sculpt the entire form at once. The only reason why I broke it down into the shapes is because I wanted to show a contrast between the two halves. Read the rest of this entry »

Tribal Back – 4

Posted by goregt On October - 6 - 2009

The top half of my back still needs some work but I want to move on to the lower back to try and pull all the shapes together. I’m going to need to start working on the right half of the back pretty soon to make sure that all the shapes are coming together correctly. Once I sculpt the right half I should get a good idea if any of the individual shapes need to be reworked.

For this step I’m sculpting the muscles and skin folds that make up the lower back. Again using a loop too I carve out the areas individual muscles. If I carve away too much I can always go back and add little bits of clay here and there but since the lower back already has too much clay I can carve away the shapes for the folds of skin (and muscles). Read the rest of this entry »

Tribal Back – 3

Posted by goregt On October - 5 - 2009

Step three in this tutorial builds on the first two steps that we used to sculpt the back. I continue to build out the individual forms by adding and removing clay to mimic the shapes in my resource material.

For this sculpture I am sculpting the details on the left side of the back first and then will move to the right side. I’m only doing it this way because it is a little easier to create a tutorial using this method. If I was just sculpting this without trying to document the process I would sculpt both side of the back at the same time. Read the rest of this entry »

Tribal Back – 2

Posted by goregt On October - 1 - 2009

In the last tutorial I briefly went over how I like to draw out a rough outline of the different muscles. I use this trick on quite a few places on the body and it really helps be understand and build out the individual shapes. For example, I like to draw out the individual muscles when I sculpt muscular arms and very lean abs. The back also has a lot going on so even though my outline is pretty rough it still helps me break down the back into the individual muscles (or shapes).

The first step is to separate my back into two halves. Now you can’t just simply carve a line down the center of the back, otherwise your sculpture will look like it has a canon going down the center of it. To make the back look more natural I will blend the two halves of the large back muscles (latissimus dorsi) into the area of where the spine is located. This task is easily accomplished by carving the center edges of the back until it gently slopes to the spine. I keep working both halves of the back until I get a look that I am happy with. Read the rest of this entry »

VIDEO

Enter the video embed code here. Remember to change the size to 320 x 270 in the embed code.

TAG CLOUD

Recommended Sites

About Me

Nothing special, just a self-taught sculptor having fun with my art and showing all of you the tips and tricks I use to create my own artwork

Twitter

    Photos

    Activate the Flickrss plugin to see the image thumbnails!